There comes a time in every Mac owner’s life where their system just cannot seem to perform at the speed at which it initially did and the performance keeps getting bogged down by multiple factors, these are the times in which the user should consider upgrading the hardware of his system so that it may yet again perform at top notch speed and we’re here to teach you just how you can pull that upgrade off.
When to upgrade:
The ideal time to upgrade the hardware on your system is when your setup gets around 2-4 years old because it is around this time that the system simply cannot handle all the next generation software with its massive system requirements and along with this you also lose your AppleCare coverage around this time frame so you kind of have to upgrade your hardware to keep it up to speed with the current times.
Why not simply buy a new one:
While you may be thinking that you could just simply sell off your previous Mac and buy a new one. It’s not as easy as it sounds because generally when you lose your AppleCare coverage, the price of your system drops extremely hard so selling it isn’t really cost efficient.
What to upgrade:
Once you’ve made the decision to upgrade your Mac there are generally two main hardware components in the system which you want to upgrade, let’s get into each of these individually:
- RAM
It’s a general consensus that more RAM translates to more speed, well this is correct so the first thing you want to upgrade on your system is your RAM.
To actually upgrade your RAM you must first know which RAM your system runs on. To find out this crucial piece of information you must first click the little apple on the top left of your screen and then open “About this MAC” which will tell you the core things you need to know.
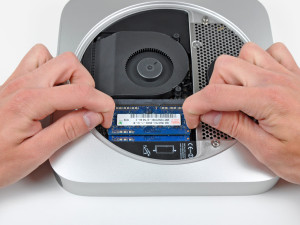
Once you’ve figured out what RAM your system supports, you’ll need to go out and purchase similar sticks of said RAM so you can install those onto your system. When you’ve finally bought your RAM the only step that remains is to install it which is a fairly straightforward process.
Make sure your device is shut off and then simply open up your system to reveal the RAM slots and then just plug the RAM in, simple as that. If you’re not sure about how to open your system then you can search around youtube for your specific model and you’re bound to find a video on how to do it.
Once you’ve had your Ram installed you will notice a massive speed boost in your system, everything will be much snappier and your Mac will be able to run those next-gen applications which it previously couldn’t.
- Hard Drive into Solid State Drive
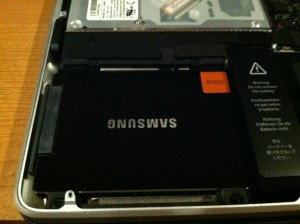
The second upgrade you can perform is to change out your old hard drive and replace it with a solid state drive which is a massive performance booster.
To perform this upgrade you first need a solid state drive with enough space to hold the data from your previous hard drive and still have free space left for your future work.
 Once you have a suitable SSD you’ll need to clone your current HDD to your new SSD, make sure to format the newly bought SSD before starting this process.
After the formatting is completed you can use cloning software to completely clone the data from your old hard drive onto your new solid state drive.
When you’ve finally cloned both drives you finally open up your Mac (You can look up tutorials on how to do so for your specific model) and plug in your SSD as the main drive.
You will now notice much faster performance from your system such as massively increased boot times, much better read/write speeds etc.
Central Coast Mac Upgrades | Apple.com


